Friday, 5 April 2013

Home made Bird breakfast feeder


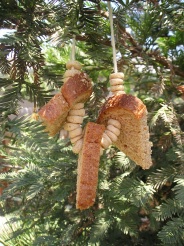
Breakfast Birdfeeder

The Breakfast Birdfeeder is an easy homemade birdfeeder craft that even toddlers can create. It's a great way to help you child invite birds into your yard! 


Level of Difficulty: Easy

Here's what you'll need...
•Stale bread or toast
•Cheerios, or any round shaped cereal
•String / yarn
•Scissors
•Pen or Pencil


Here's how you make it...
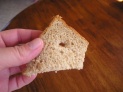
1. With a pen or pencil punch holes into your bread slices and if not toasted, leave out until stale (overnight).
2. Using your yarn, string together the bread crusts and cereal and find a great place to hang it in your favorite tree! Soon you will have some little friends in your yard!


Pinecone Birdfeeder

The Pinecone Birdfeeder is an easy way to invite birds into your yard! Search around your yard or neighborhood for some pincones and the rest you'll probably find in your pantry!

Level of Difficulty: Easy to Moderate


Here's what you'll need...
•Pine cone (bigger is better)
•Peanut butter and something to spread it with
•Seeds, either bird feed or sunflower seeds/nuts
•Yarn and scissors to cut
•Paper plate 

Here's how you make it...
1. Tie your yarn around your pinecone and then tie it again at the top so that you can hang it on your favorite tree. 

2. Smear peanut butter into the groves of the pine cone, pour some seeds onto a paper plate and roll the cone around to coat it.

3. Hang it in your favorite tree, try and hang it by a strong branch so the birds have somewhere to perch! Hopefully soon you'll have some new friends arrive for a visit! 


Fun Spring time activities... Butterfly Baggies


Butterfly Baggie

This butterfly Baggie is just that - a butterfly made from a regular zip-lock baggie! If you can crumple paper, you can do this craft, perfect for toddlers and preschoolers!


Ages: 2 and Up

Here's what you'll need...
• Zip-lock baggie
• Construction paper
• Pipe cleaner
• Scissors 

Here's how you make it...
1. Cut the top off the baggie that sticks up above the zipper. 

2. Cut construction paper into squares, crumple them and place them inside the baggie. Fill the baggie about ⅔ full. 

3. Squeeze out the air in the baggie and seal it tight. Gather it in the middle and wrap and twist a pipe cleaner around the center. Twirl the ends to make the butterfly's antennas.
There are other ways to do this craft. You can slide flat pieces of paper inside the baggie, fold the baggie accordion-style and secure with a pipe cleaner. You can also use a clothespin for the center rather than a pipe cleaner. 

Tuesday, 26 February 2013

Fun easy easter egg colouring


Fun easy easter idea

  1. Gather your materials. You will need some cooled hard boiled eggs, paper to protect your table ( we have some cardboard under the newspaper, stationary stickers, dye and a dye hook.  I caved and grabbed the commercial dye , I swore I was going to go au natural this year but exhaustion got the better of me.  Here is a wonderful post from Crunchy Domestic Goddess about how to dye them naturally, I bookmarked it intending to use it. Polka Dot Easter Eggs
  2. Get everything prepped before inviting the kiddo to the table- dye is not something you want “help” with.
  3. Add your stickers. These reinforcements worked ok, but were really hard to get off once dry.Polka Dot Easter Eggs
  4. This lace pattern was my favorite.Polka Dot Easter Eggs
  5. My son wanted to make a happy face ( this was the egg that broke and turned into part of his lunch).Polka Dot Easter Eggs
  6. The circle stickers were much easier to take off.
  7. Dye your eggs.Polka Dot Easter Eggs
  8. Add in a color mixing lesson too! We added the blue to this pink after to make purple.Polka Dot Easter Eggs
  9. Let dry and remove the stickers. Some came off easily, some did not.Polka Dot Easter Eggs

Saturday, 9 February 2013

Heart Handprints


Handprint Heart

Handprint heart

If your child prints a handprint heart, it will be yours forever! These make a super quick craft activity for Valentine's Day or Mother's Day and a lovely keepsake, too.
You will need:
Pink and purple paint
Paper

Instructions:
Keeping fingers together, print a handprint of purple paint on the centre of the paper. With the other hand add a handprint of pink paint overlapping the fingers with the purple handprint.